Post Highlights
UIDAI Supervisor/Operator Certification Exam is conducted by UIDAI. The candidates who want to work as Aadhaar Operator or Supervisor, must paas this NSEIT exam.
In this article, we will explain the complete UIDAI Operator/Supervisor online application process, Aadhaar XML upload process, payment rules, exam slot validity, admit card download process, re-attempt rules, and important instructions according to the latest UIDAI guidelines.

Intersted candidated must get register himself/herself and clear this exam. After passing this exam a certificate will issue to you. With the help of this, you can set your own center for all aadhaar car services
What is UIDAI Supervisor Certification Exam?
UIDAI Supervisor/Operator Certification Exam is required for candidates who want to work in:
- Aadhaar Enrollment Centers
- Aadhaar Update Centers
- CSC Aadhaar Services
Candidates must pass the certification examination to become authorized Aadhaar Operator or Supervisor.
UIDAI Supervisor Exam Guidelines:
- Candidate Aadhaar card number should not be blacklisted by UIDAI.
- Applicant age must be 18 years
- Interested candidate must have completed Aadhaar Paperless Offline e-KYC and downloaded XML file.
- Candidate must get register to any active enrollment agency for this exam.
- Must have facility to pay fee via Online mode (Debit card, Credit Card or Net banking)
- Must have updated his/her recent photo in Aadhaar in last three months for verification on exam date.
- Mobile number registered with Aadhaar Card.
UIDAI Supervisor Exam 2026 Online Application Process
Follow the step-by-step process given below carefully.
Step 1: Mobile Number Must Be Linked With Aadhaar
Before starting registration, ensure that your current mobile number is linked with your Aadhaar card because OTP verification will be completed through the Aadhaar linked mobile number.
Without Aadhaar linked mobile verification, registration cannot be completed.
Step 2: Update Latest Photograph in Aadhaar
Candidates should update aadhaar with their latest photograph before downloading:
- e-Aadhaar
- Offline Aadhaar XML File
The uploaded Aadhaar photograph will be verified by the Registrar/User during application approval.
Step 3: Download Offline Aadhaar XML File
Visit the official myAadhaar Offline eKYC portal: myAadhaar Offline eKYC Portal
- Enter Aadhaar Number
- Verify OTP
- Generate Offline Aadhaar XML
- Create a Share Code
- Download XML ZIP file
Keep the Share Code safe because it will be required during registration.
Step 4: Create New User Account
Visit the official UIDAI DEXiT Global Certification Portal: UIDAI DEXiT Global Portal
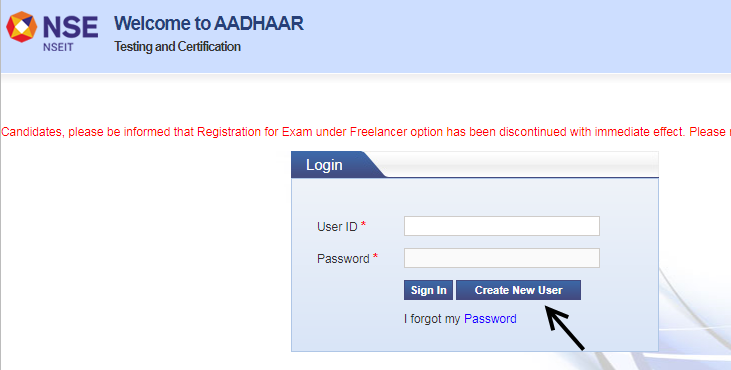
Now complete the following steps:
- Upload Offline Aadhaar XML file
- Enter Share Code
- Enter Aadhaar-linked Mobile Number
- Submit registration details
Step 5: OTP Verification & Aadhaar Consent
After Aadhaar verification an OTP will be sent to the registered mobile number. Enter OTP and provide consent for Aadhaar data usage for examination purposes. Once verification is successful, registration will proceed further.
Step 6: Obtain Registration ID & Password
After successful registration a registration ID and default password will be sent to your registered mobile number or email.
Candidates should login immediately and change his/her password. Must save your login credentials for further use.
Step 7: Fill UIDAI Application Form
After login, verify pre filled Aadhaar details and complete the application form.
Enter Following Details
- Educational Qualification
- Exam Level
- Exam Language
- Enrollment Agency Code
- Registrar Code
- Preferred Exam Center
- LMS Details
Upload Required Documents
- Educational Documents
- LMS Documents
Complete Questionnaire Section
Fill all mandatory questionnaire details carefully. Finally, submit the application for Registrar approval.
Step 8: Registrar Approval Rules
Important rules regarding Registrar approval:
- Application must be approved within 30 days
- Otherwise, the application will be automatically rejected
- If the same Registrar rejects the application 3 times, candidates cannot select that Registrar again
Candidates should regularly check application status after submission.
Step 9: Make Examination Fee Payment
After Registrar approval, candidates must pay the examination fee within 30 days through the Payment section.
Failure to make payment within the validity period will result in automatic rejection.
UIDAI Exam Payment Methods
Candidates can pay through UPI, Debit Card, Credit Card or Net Banking
Prepaid Method
Applicable for candidates who already made payment through Registrar or Enrollment Agency.
Step 10: Download Payment Receipt
After successful payment download payment receipt and save PDF copy safely. This receipt may be required for future verification.
Step 11: Mock Test & Slot Booking
Candidates should first attempt the mock examination to understand:
- examination interface
- question pattern
- online test process
After mock test:
- visit Seat Booking section
- select exam center
- choose preferred date and slot
Validity of UIDAI Exam Slot
The examination must be completed within 180 days from the date of successful payment.
If the examination is not completed within this period:
- application will be automatically rejected
- paid fee will be forfeited
What to Do if Application Gets Auto Rejected?
In case of automatic rejection, submit a fresh application and obtain Registrar approval again, also need to make fresh payment, previous payment will not be adjusted.
Step 12: Download UIDAI Admit Card
After successful slot booking, candidates can download the Admit Card. Candidates should carefully verify all details mentioned in the admit card.
What If Exam Slots Are Not Available?
If slots are unavailable at the preferred location:
- Wait for 7 days after successful payment
- If slots are still unavailable, send email to:
- If issue remains unresolved, contact UIDAI Headquarters Training, Testing & Certification Division.
Authorization Validity Rules
The authorization validity starts from the date of Registrar approval and remains valid for 30 days.
Candidates must appear in the examination within this validity period.
If candidate:
- fails examination
- remains absent
- validity expires
Then a fresh application must be submitted.
UIDAI Exam Re-attempt Rules
Important re-attempt rules:
- 3 re-attempts allowed with nominal fee
- After 3 attempts, full examination fee will be charged again
- Same cycle repeats for every certification attempt
UIDAI Exam No Refund Policy
Once examination fee is paid refund is not allowed
For failed payment issues, contact on this email: [email protected]
UIDAI Certification Fee Validity
The NSEIT UIDAI certification fee remains valid for 180 days from payment date
Candidates should complete slot booking and examination within this period.
Documents Required on UIDAI Exam Day
Candidates must carry:
Identity Documents
- Printed Admit Card
- Latest e-Aadhaar copy with updated photograph
OR - Aadhaar PVC Card
- Aadhaar Letter
Download e-Aadhaar from:
Important: If photograph mismatch occurs or admit card is unavailable, candidate may be declared ineligible.
Also Read:
Order Aadhaar PVC Card Online
Change Name in PAN Card as per Aadhaar
UIDAI Helpdesk & Support Details
Telephone Support
022-42706508
Timing
Monday to Saturday
9:30 AM to 6:00 PM
Email Support : [email protected]
FAQs
Yes, OTP verification is completed through Aadhaar-linked mobile number.
Offline Aadhaar XML is a digitally signed Aadhaar verification file used for UIDAI registration and identity authentication.
The application gets automatically rejected.
The fee remains valid for 180 days from payment date.
Candidates get 3 re-attempts with nominal fee. After that, full fee is charged again.
No, the fee is non-refundable.
Candidates should wait 7 days and contact UIDAI support if slots remain unavailable.